See how to winterize RV parts yourself!…
With winter just around the corner, it’s time to think about putting your RV into safe storage for the long cold months ahead.

Should you take your RV back to the dealer to have it winterized?
Or is this something you can do yourself?
Having been a full-time RVer, on and off, the past 50+ years I’m going to show you how to winterize an RV yourself…
Winterizing Your RV
RV dealerships are only concerned with what damage ice in the water system will do to your RV.
When water freezes and turns to ice, it expands.
This will cause pipes to split, tanks to rupture, and pumps to fail.
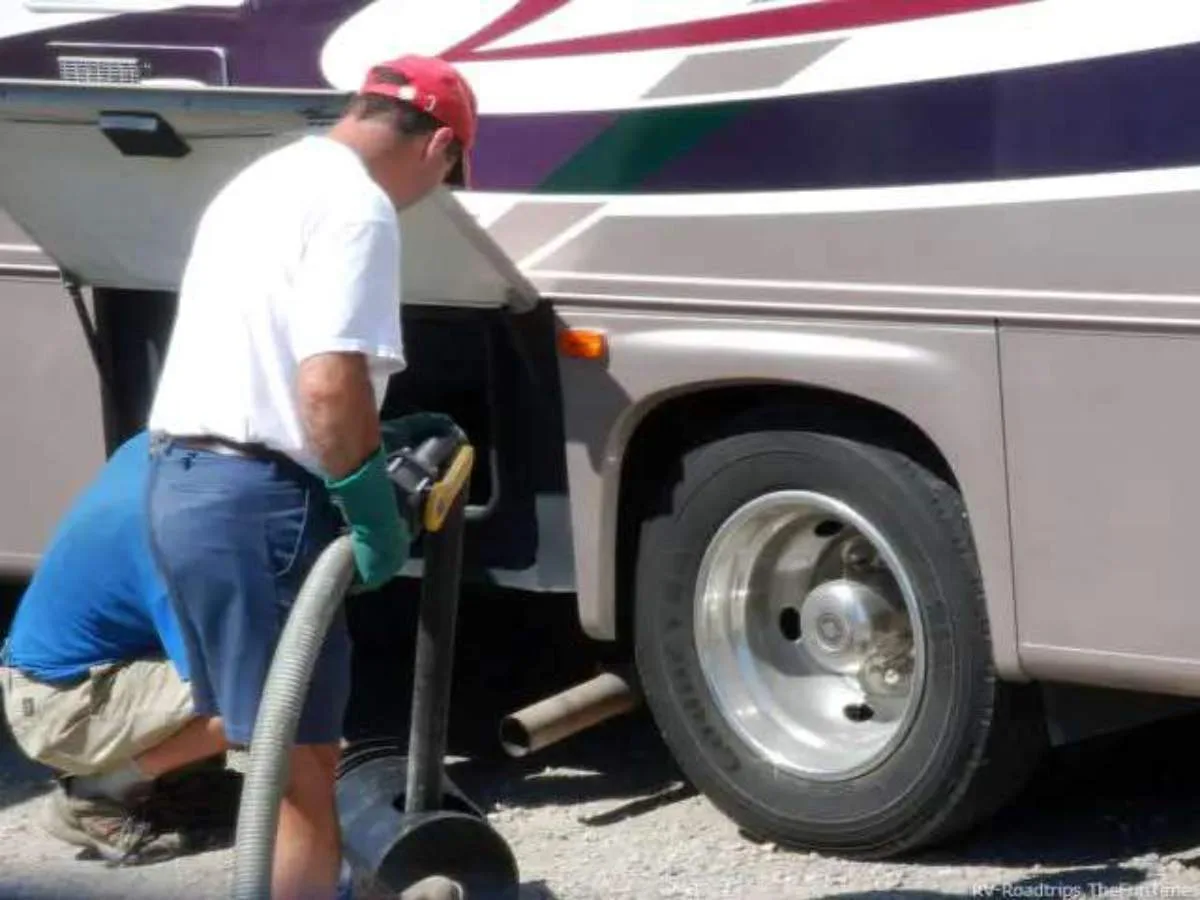
#1 – How To Winterize An RV Water System
To properly winterize your RV water system you need to:
- Drain it.
- Evacuate any remaining water by using compressed air
- Pump RV antifreeze through the entire system.
RV dealers will perform this service for you — but their labor rates are close to $100 an hour!


Learning how to winterize your RV water system might take a little effort the first time around — but next year it will be a snap.
Damage to an unprotected water system will easily cost over $1,000 — which is why this is considered the most important first step in the winterization process.
Even though the RV dealer may think you’re good to go after you’ve protected the water system, there are a number of other issues that need to be addressed before your RV is ready for storage…
#2 – How To Winterize RV Generators
If your RV is equipped with a generator, you need to drain it of fuel. Left for months, fuel can turn to lacquer that will plug the jets in the carburetor.
Getting it to start might next spring might require a sizable repair bill if you don’t allow it to run out of gas before putting it in storage.
TIP: Your RV generator may not have a fuel shut-off valve installed from the factory — but installing one is well worth the effort.
With the generator running, shut off the fuel valve, and allow the generator to run until it quits from lack of fuel.
Be sure to push the kill switch after it stops running — because, if yours is like mine, the electric fuel pump continues to run as long as the run button is in the ON position.

#3 – How To Winterize RV Batteries
RV trailers may only have one battery, while motorhomes may have 3 or 4 batteries.
For a single battery… you should disconnect and remove it — to be stored in a warm environment. First, make sure that the water level is sufficient and that the battery is fully charged. Then, put it in a safe place.
TIP: Don’t leave an RV battery sitting directly on a concrete floor — because that will allow it to slowly drain. If the garage floor is where you plan to keep it, put it on a piece of plywood first.
If your motorhome is equipped with multiple batteries (and a battery disconnect system)… you should prepare the batteries as stated and turn off the disconnect. Installing a solar trickle charger will help keep your batteries fully charged — just set it on the dashboard where sunlight can get to it, and plug it into the cigarette lighter.
Don’t forget to remove small batteries from your RV gadgets too — because they can freeze, leak, and become destroyed. Remember to remove the batteries from TV remotes, smoke detectors, carbon monoxide detectors, and the clock on the wall.
Here are some additional winter RV battery and storage tips.
#4 – How To Winterize Your RV’s Exterior
Over the winter months any dirt, grime, or road chemicals not removed from the exterior of your RV will continue to rust, dissolve, or discolor the finish. This will quickly age your RV and spoil that shiny new look.
In many dusty regions, county highway crews often apply calcium chloride (liquid salt) as a dust control agent on dirt roads. It can create pits and corrosion on aluminum wheels — just like winter road salt does to your car. The best protection is a good wash and wax before you store your RV for the winter.
Make sure all of your RV tires are properly inflated. Sitting for months with under-inflated tires can cause flat spots to develop. Even worse… if allowed to go flat, sidewall cracks and weak spots will be the result. Also, the sun’s ultraviolet rays will rot your tires causing them to fail unexpectedly. So be sure to install RV tire covers to keep the sun’s rays from getting to them.
Sun and snow are your RV’s worst enemies. In addition to protecting your tires with tire covers, if your RV will remain outdoors throughout the winter, it’s important to protect the RV itself with a cover as well.
An RV garage or canopy will protect your RV investment from sun and weather damage. As a less expensive alternative… an inexpensive plastic tarp will go a long way toward preventing both sun damage and water infiltration from the melting snow. Don’t scrimp, the more of your RV you cover, the better!
TIP: A bungee cord is the most common way of attaching a plastic tarp over an RV. The metal hooks, though plastic coated, will cause damage if allowed to rest on the finished surfaces of the exterior of your RV. Wind will move them around, and by spring there will be bare metal showing where paint should be. A simple way to avoid this damage is to take strips of old bathroom towels and wrap the hooks — securely tying them in place with string.
#5 – How To Winterize Your RV’s Interior
Sun damage will cause fabrics to become brittle, plastic to yellow, and carpet to fade inside your RV. To prevent this, lower the window shades, cover the windshield, and do whatever you can to keep direct sunlight from beaming into your RV.
Also, make sure all of the windows are closed and latched and that the roof vents are closed tight. Unlike rain, snow will blow around — and even with Maxxair vent covers the snow will get in through any opening.
Don’t forget to remove all food items from your RV — including boxed dry goods and canned goods. Cans are likely to freeze and split, and dry goods will keep winter rodents fat and happy.
Keeping mice out of your RV can be a real problem. They will chew up fabric or insulation to make nests, and they can damage wiring and other non-food related items as well.
By setting up a multiple catch mouse trap, you will keep your RV secure against four-legged intruders that are trying to make their home inside your RV.
#6 – How To Winterize The RV Drivetrain
Motorhomes need a little more attention than RV trailers.
The most critical thing is to make sure your engine coolant is protected from cold temperatures well below zero. Any plain water you may have added over the summer will dilute the mixture, raising the temperature at which your coolant will freeze. It needs to be protected at least to -30 degrees Fahrenheit.
Fall is a good time to do any servicing on your RV — such as oil changes and chassis lubrication. A fresh RV oil change will remove any impurities that might be lingering in your old oil. Additives break down, and acids build up. If you do your servicing in the fall, then once the first warm days of spring return you’ll be ready to go!
Topping off the fuel tank will also prevent condensation from forming in the tank. Moisture leads to rust and corrosion which can plug fuel filters and fuel systems.
#7 – Other Miscellaneous Items To Winterize
- RV Refrigerator – The refrigerator doors should be left open to allow the interior to stay dry and prevent mold from forming. (I use bungee cords to hold them back — so they can’t mysteriously close on their own.)
- RV Washer/Dryer, Ice Maker, Filtered Water Faucet, Outdoor Shower – These RV accessories are often overlooked when draining the RV water system. Be sure to include them or they will become damaged during freezing conditions.
- RV Propane – Make sure the propane is shut off at the tank. A leak could allow fumes to build up in your RV leading to a possible fire or explosion.


Where To Store Your RV Longterm
The absolute best option is to store your RV fully protected in a heated garage or a storage building. For most of us, this isn’t an option. Usually, it’s a matter of parking the RV wherever it fits — like beside the garage or off the side of the driveway.
A second choice for parking would be a concrete or blacktop parking pad.
The next best option would be a well-drained dry gravel parking pad.
The last choice would be somewhere on the lawn in the backyard.
Parking an RV on the lawn creates all sorts of problems. Next spring, the lawn will be the last place to dry up enough to allow you to safely move the RV. All this moisture will wick up into your RV — rusting the undercarriage, wheels, brakes, etc. Weeds will grow and stain the outside of your RV, and rust will spread quickly to every corner of your RV. You can lessen the chance of moisture damage by placing a layer of heavy plastic on the ground underneath your RV.
For some, due to zoning restrictions or lack of space, renting RV storage space in a permanent storage lot is the only option. Be aware that storage facilities are not held liable for any damage to your RV for any reason. You must maintain comprehensive insurance or storage insurance if you wish to be reimbursed in the event of vandalism, theft, fire, or any other calamity that may affect your RV while it’s in storage.
TIP: Since RVs are made as lightweight as possible, they can’t handle the weight of deep snow on the roof. Winter snow load can seriously damage your RV. Too much weight can collapse the roof, split the seams, and distort the side walls. Even worse… when snow is allowed to accumulate on the roof, the layer close to the roof will often melt and remain wet while the outer crust stays frozen. Snow acts like an insulator. As the heat of the sun warms the interior of your RV, that first layer of snow melts and can stay wet. Water from snowmelt will seep into the tiniest of openings — resulting in water stains, delamination, and soft spots on the floor. These kinds of RV repairs are very costly — sometimes well beyond the value of the RV.
Must read: You Winterized It, But Did You Prepare Your RV For Storage?
The Bottom Line
Once you’ve made it to this point, you can feel comfortable that you have properly winterized your RV better than any RV dealer would have done for you!
Next spring, you’ll be ready to travel and camp again — without worrying about what’s not going to work, or what has to be repaired.
TIP: You should use RV checklists for your winterization project and other maintenance issues. That way, you’ll be sure not to overlook anything!
Next… you need to know how to de-winterize RV systems and prepare your RV for its first outing after being stored for the winter.
Like this post? Save it to read again later… or share with others on Pinterest!