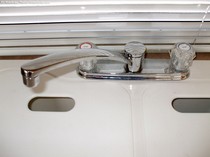
 Last Spring when I brought my Dutchman out of storage to prepare for our first RV trip of the year, as soon as I pressurized the water system I saw I had a problem. The kitchen faucet was leaking water all over the countertop.
The one weak link in the plumbing systems in most RVs produced today is the plastic faucet fixtures used throughout. Even though they might be chrome plated, most are still made of plastic and have an unusually high failure rate.
Delta Kitchen Faucet Repair
Our RV travel trailer was only a year old, probably still covered under warranty, when the kitchen faucet repair became necessary.
I chose to upgrade the kitchen faucet fixture in our RV, rather than replace it with the same low buck faucet that came from the factory. A quick trip to the local home center provided me with a quality all-metal faucet fixture made by Delta that was a suitable replacement. By upgrading to a quality unit, any further failure of seals or seats could be remedied with rebuild kits that are easily found at any hardware store.
How To Replace A Kitchen Faucet In An RV
Today’s RV manufacturers have done one thing right. They’ve made the task of upgrading your kitchen faucet a simple swap-out procedure. If you’re replacing the faucet yourself, the hardest part of the whole project will be that the fittings are located behind the sink and may be darn hard to get at.
With the water pump OFF, bleed the water pressure by opening the faucet. Do this with both Hot and Cold, as this will allow water to drain back away from the faucet — reducing the amount of water that may spill.
You will likely be working by feel, as there just isn’t enough room to get in a position to see what you’re doing. Follow the water lines up to the faucet and you will find a nut that attaches it to the faucet. It will require one special tool for this project, a inexpensive basin wrench that can be purchased at your local hardware store.
Using the wrench to break the fitting loose, remove the water supply lines from the faucet. Keep track of which is which, as the Hot will go on the left side and Cold on the right side. Some manufacturers use RED water lines to identify the hot water.
With the water disconnected, you will find 2 large nuts with protruding tabs that secure the faucet itself to the countertop. Equally hard to reach, though they can usually be loosened by hand pressure alone. With the nuts removed, the faucet can be lifted from the counter.
Take the faucet with you when you shop for a replacement. There are many different configurations, some will require 2 holes in the counter, some will fit with 3 holes. There may be differences in the water line attachment fittings, as well. You want an exact match with the under the counter part of the kitchen faucet fixture or this project will quickly get out of hand. What you see above the counter can be chosen to suit your specific tastes.
Installation is a simple matter of doing the same as disassembly, only in reverse order. A layer of plumbers putty between the faucet fixture and the counter will make sure water doesn’t migrate under the countertop.
How To Replace An RV Shower Fixture
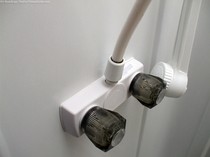 Replacing the shower fixture in you RV is even easier, providing the manufacturer has supplied a removable panel behind the shower to grant access to the fittings.
Most RVs have the same standard plastic shower faucet with the handheld sprayer and hose attached. Unfortunately, a suitable swap-out replacement shower fixture probably won’t be available at the local hardware store. Amazon.com is a good source for RV shower parts and RV shower fixtures, as is any RV dealership.
For the most part, rebuilding or repairing the standard water faucet on your RV just isn’t worth the effort. Most likely, you won’t be able to obtain seals or parts anyway. Instead, your money and time are better spent upgrading to a quality unit from a name brand that provides replacement parts and seals. It just isn’t that expensive to do it right.

