Electricity is expensive here (.18 per KW), and I don’t want to be paying to run the A/C all the time.
So I made my own RV swamp cooler for about $50 total.
Here’s how I made an evaporative cooler for my motorhome…
An evaporative cooler (also swamp cooler, desert cooler and wet air cooler) is a device that cools air through the evaporation of water. Evaporative cooling differs from typical air conditioning systems which use vapor-compression or absorption refrigeration cycles. Source
Want To Save Money On RV Air Conditioning?
Going to the Southwest for the winter months is a no-brainer. Forget the heavy snow and bitter cold that takes over most of the country, and enjoy some much milder temps from October through March.
But if you show up a few months early or stay a few months longer, you will think your electric meter has gone nuts!
Air conditioning works on the principle of compressing and squeezing the moisture out of the air. In Arizona, there is practically no moisture to be squeezed. Your A/C will work hard, and the little wheel on the power meter will spin ferociously.
There’s a better way to keep the temps inside your RV at a manageable level without paying the padded high rates that most RV parks will charge you for electricity.
Try A Swamp Cooler!
Swamp coolers (evaporative coolers) have been the chosen method of cooling in the Southwest forever.
Here’s how it works:
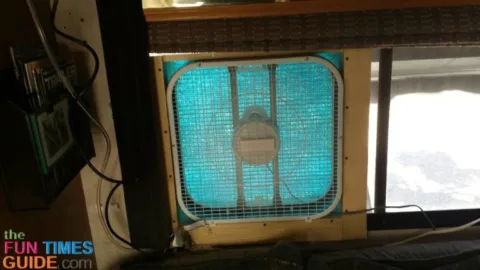
A simple electric fan draws air through a water soaked membrane causing evaporation as the air comes into the living space. By leaving one window partially opened at the farthest distance from the window cooler, warm air is replaced with cool air coming in through the fan.
A fan uses a small fraction of the electricity that an air conditioner uses, and you have the added benefit of increased humidity. This is more comfortable for both humans and RVs. (Dry air causes wood to shrink & warp, and this can cause all kinds of problems.)
A commercially built swamp cooler will cost anywhere from $400 to $1,000 — depending on if you have it installed or not.
However, you can construct a very simple but very effective evaporative cooler yourself using:
- a $20 box fan
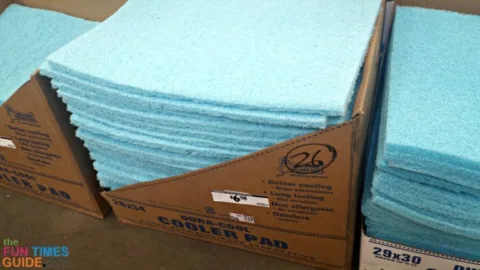
- a sheet of cooler membrane (aka cooler pad)
- a small water fountain pump
- a small water bucket
- a plastic tube (that will reach from your water source to the fan)
- a few pieces of 1-inch pine wood
If you own a skill saw and a screwdriver, then you have all the tools necessary!
I was able to purchase everything for this project at Home Depot.
How To Make A Swamp Cooler Yourself
If your RV has a slide-by window large enough to set a 20-inch box fan in it, then it’s likely you can make this work for you.
Here’s how to do it:
- Attach a layer of evaporative cooler pad to the back side of a box fan. (How you do it is up to you.)
- Attach a length of plastic hose (of a size that will fit onto a small fountain pump) across the top of the water membrane.
- Poke a zillion holes in the tube with a push pin — so water will slowly drip down over the cooler membrane.
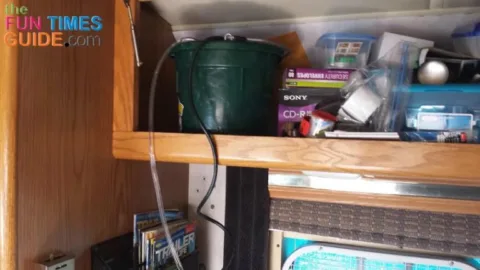
- Plug off the far end of the tube, or the excess water will run out on the ground. Be aware that small fountain pumps will only push water up a couple feet. In my installation, the bucket of water was placed in an overhead compartment — so the water was actually going downhill.
- For the water supply, a simple bucket is sufficient. Hopefully, the water flow will match the rate of evaporation and there will be little or no excess running off the bottom of the cooler membrane.
You can make it as fancy or simple as you like.
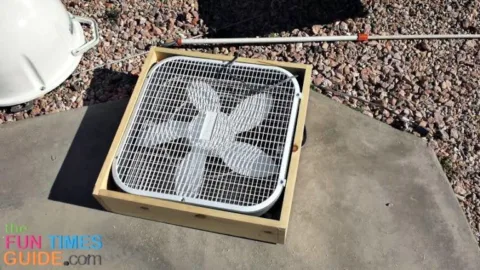
My evaporative cooler (pictured above) has a box frame so that the box fan fits snugly inside. The cooler membrane is mounted in its own frame with hardware cloth on both sides, giving a 3-inch space between the fan and the membrane.
So far, water consumption in 80 degree temps has been about 1 gallon every couple hours.
As Spring goes into Summer, I expect the water consumption will increase — but at least the electric bill should remain stable, for the most part.
I’ve been involved in RVing for over 50 years — including camping, building, repairing, and even selling RVs and motorhomes. I’ve owned, used, and repaired almost every class and style of RV ever made. I do all of my own repair work. My other interests include cooking, living with an aging dog, and dealing with diabetic issues. If you can combine a grease monkey with a computer geek, throw in a touch of information nut and organization freak, combined with a little bit of storyteller… you’ve got a good idea of who I am. To date, I’ve shared my RV knowledge in over 300 articles here at The Fun Times Guide! Many of them have over 25K shares.


