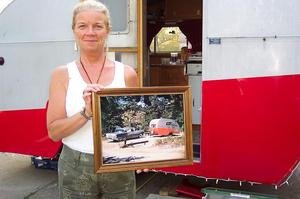
 When you buy a new RV, you will almost immediately want to start adding your own personal touch to the bare walls, shelves, nooks, and crannies.
But before you do, just remember that your RV will be motoring down the highway, turning corners, and stopping suddenly on occasion.
The last thing you want is for something to jump off the wall or take the high dive from your entertainment center display case.
The following 2 tips will prevent that from happening to the pictures that you hang on the walls of your RV interior…
2 Tips For Hanging Pictures In Your RV
There are a few different ways to secure framed pictures to the wall of your RV.
Here are 2 semi-permanent methods that work best:
#1 The most secure method would be to attach your pictures directly to the wall with screws. If you take the time to shop around, you can probably find some nice neat screws with smaller heads that will blend in nicely.
The occasional factory-mounted picture will be mounted to the RV interior in this manner.
Here’s how to do it:
- Pre-drill holes in the corner of your picture frame so that it doesn’t crack or split. When you screw into the wall, hopefully at least a couple of the screws will secure into a stud or other more solid structure behind the wall board.
- Because the most aesthetic location probably won’t have solid structure conveniently located at the corners of the picture, with the picture held where you want it to hang, you’ll need to locate the wall stud behind the picture first. Mark and drill 2 holes in the frame where the stud will pass behind the picture — one hole on the top of the frame and a corresponding hole on the bottom of the frame.
- Do this regardless of how off-centered the screws may be. If you choose neat smaller screws, they will hardly be noticeable. To hide them further, a touch of matching paint will make them all but disappear.
#2 The second most recommended method of attaching a picture to your RV interior walls will leave you with the option to change out the picture effortlessly: simply hang your picture as you would at home. However, this needs to be done in a way that the picture will rest flat against the wall. The answer is: Velcro!
Here’s how to do it:
- Once the picture is hung, attach some strips of Velcro to the back of the picture.
- Attach the corresponding half of the Velcro to the wall.
- Peel-and-stick Velcro makes this a quick process. (If the picture is lightweight, the Velcro alone may be enough to hold the picture in place.)
Velcro will also work to secure a wall clock in place or keep your favorite piece of wall decor in place while traveling too. The key issue is weight. If the item you’re wanting to display is rather lightweight, Velcro will probably keep it in place for you.
If you want to be extra careful, use a combination of special hangers and Velcro strips.
Of course, I would avoid trying to secure expensive items with Velcro– because there is no guarantee that it will stay in place. Leave the Ming Dynasty vase at home. If your decorative items are of the expensive nature, take them down and carefully pack them away before you hit the road in the RV.
Adding your own personal touch to your RV interior is how you make it part of the family. Just like your home, you want it to be cozy and comfortable.
More Tips For Hanging Pictures & Decorating The Walls Of Your RV
- How To Hang Things On The Walls Of Your RV – tacky putty, velcro, 3M removable fastners, suction cups
- RV Picture Hanging Tips – 3M product that uses interlocking fasteners with an adhesive
- Hanging Pictures In Your RV Without Hurting The Walls – museum putty (aka Quake Hold)


