DIY RV Toilet Repair Tips
Under normal circumstances, the toilet in your RV retains water in the bowl.
The most important reason for that water is to block odor from coming up into the living space.
 and are no longer doing the job. Here's how to fix your RV toilet.")
The proper method of use in an RV is to hold the water valve open after flushing to allow about an inch of water to sit in the bottom of the toilet bowl after the valve has closed.
If that inch of water mysteriously disappears awhile after flushing, it’s an indication that the rubber seals around that large valve have gotten hard (or damaged) and are no longer doing the job — and it’s time to fix your RV toilet.
Fortunately, it’s a simple task that you can do yourself!
Aqua Magic RV Toilets
Aqua Magic toilets made by Thetford are the most common toilets found in all but the most expensive of RVs.
There are a few other brands, including some that are ceramic and similar to what you find in a home.
But, if your RV cost less than $100,000, then the odds are pretty good you have a Thetford Aqua Magic toilet.
One nice thing about the Thetford RV toilet is the fact that Aqua Magic parts are readily available.
As a result, most people choose to repair rather than replace their RV toilet.
What Can Go Wrong With An RV Toilet?
The RV toilet is a straightforward device, with pretty much only 2 areas that may cause you any problems:
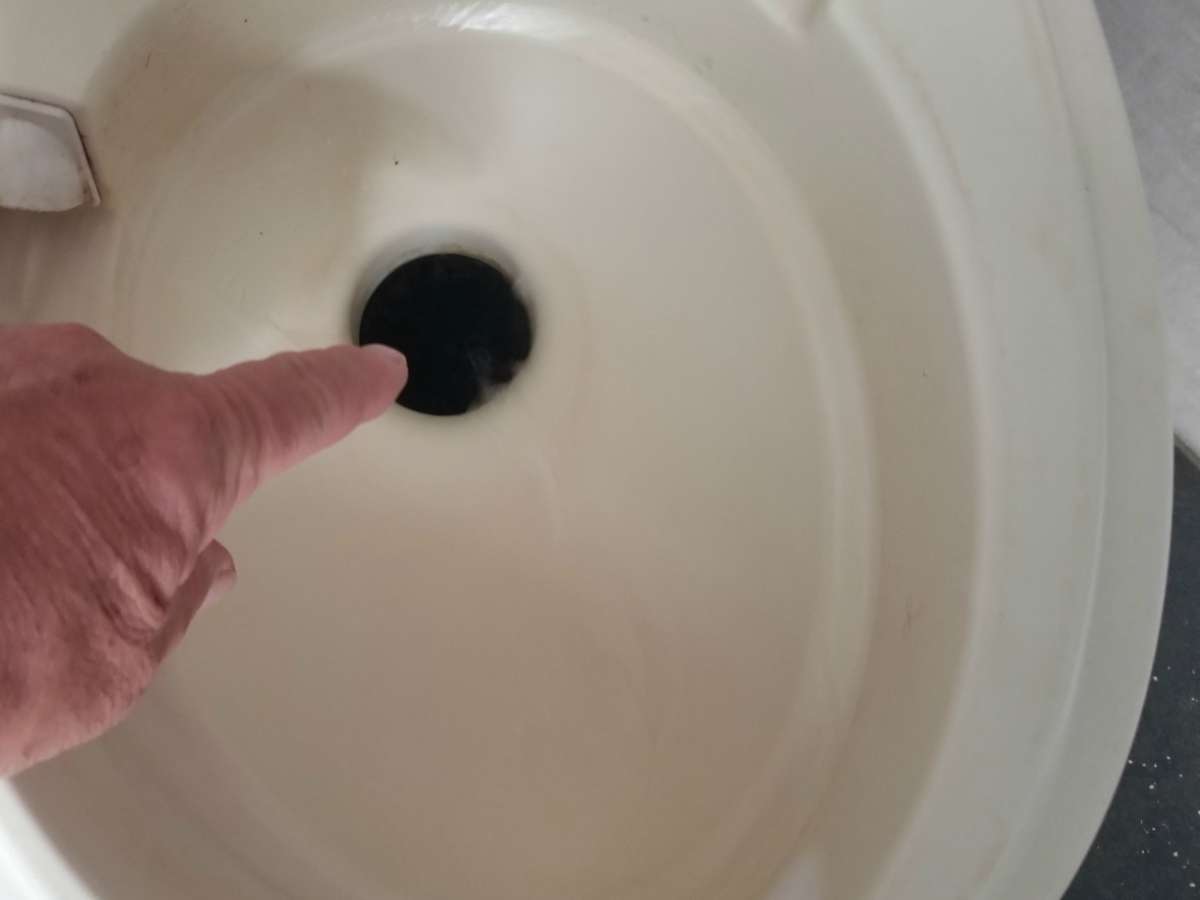
- The blade seals for the wide valve at the bottom of the bowl fail to keep water in the bowl (explained above).
- The water valve on the back of the toilet fails and water continues to run when you release the water valve control handle (or pedal, depending on your model).
Both of these are rather simple DIY projects that most RVers can handle on their own.
Of course, since the whole toilet is plastic… If you happen to break any parts, you will find most are readily available.
How To Repair An RV Toilet

To repair your RV toilet yourself, follow these steps:
Time needed: 4 hours
How to Repair an RV toilet
- Order parts for the specific brand and model number of your RV toilet:
– Blade seal replacement kits for Thetford RV toilets
– Water valve replacement kits for Thetford RV toilets - Turn OFF the water pressure.
You do this either by turning off the “city water” valve OR turning off the on switch for the on-board water pump.
- Flush the toilet.
This will bleed off any remaining water pressure and to empty all water out of the toilet bowl.
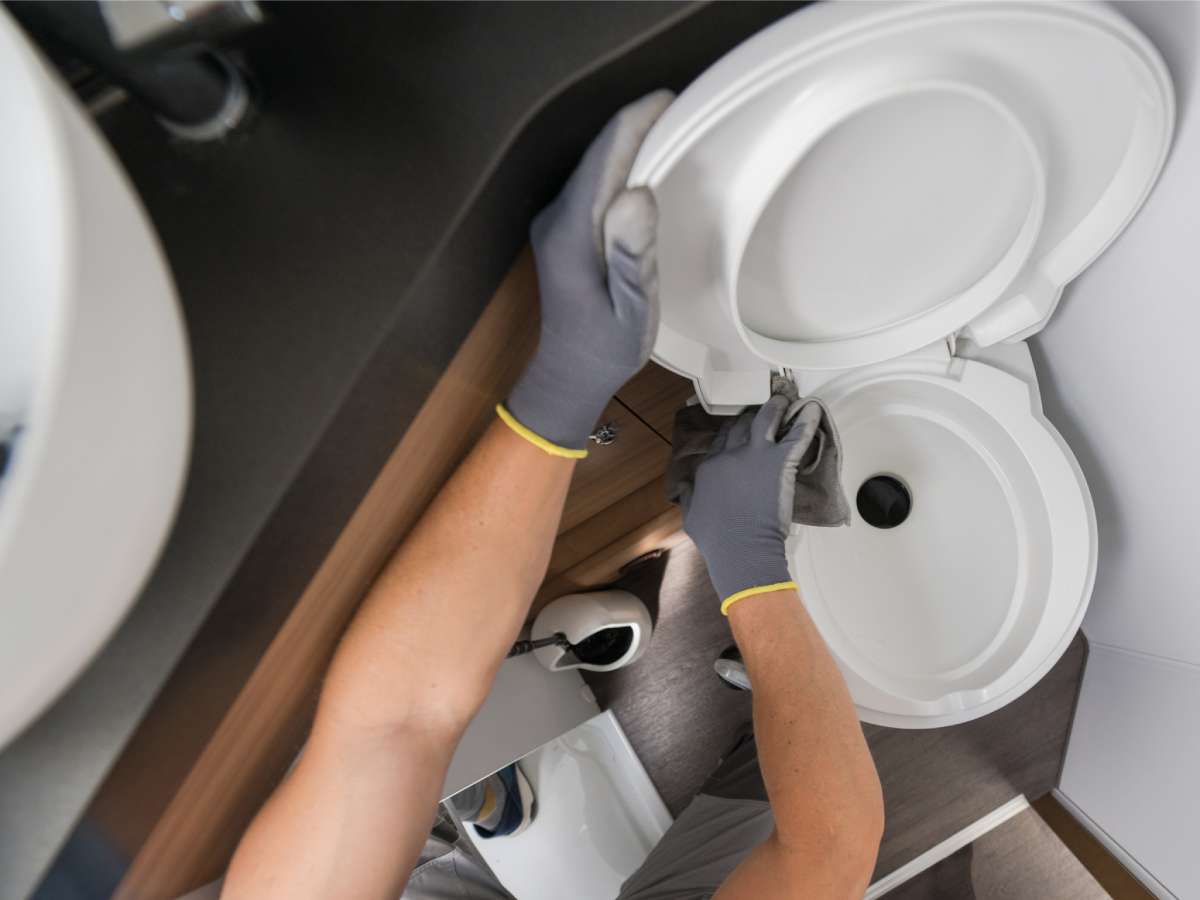
- The toilet will have to be removed in order to work on it — because repairs are made from the rear or bottom side.
To remove your RV toilet, simply remove the 2 bolts (one on each side) that secure the toilet to the floor. You’ll then be able to lift the toilet away from the wall and access the water connection at the back side of the toilet. With the water line disconnected, you can then remove the toilet to a nearby work bench or table. You might want to lay a cloth rag across the hole to help keep odors at bay, and to prevent anything from falling into the black water tank.
- Unlike house toilets,
RV toilets don’t use a wax ring to seal the toilet to the drain pipe. Instead, RV toilets have a rubber ring that acts as the seal.
- Read the Instructions
Depending on what portion of the toilet your repairs are concerned with, refer to the parts diagram that comes with the repair kit for disassembly instructions.
- Reinstall the toilet, paying attention to these notes:
– If you’re repairing the blade seals… Before you reinstall the toilet in the RV, pour 1 quart of water into the toilet to make sure the new seals will hold water.
– If you’re replacing the water valve… Once you have reinstalled the water line, pressurize the water system to make sure the valve doesn’t leak. If it passes this test, then go ahead and bolt it back down to the floor. - New Seals
It’s recommended that you install a new rubber seal between the toilet and the floor flange when you reinstall the toilet.
That’s all there is to it!
The Bottom Line
Toilet problems can really put the damper on a good RV outing.
Fortunately, repairing an RV toilet isn’t really as bad as it sounds. The stinky part stays in the black water tank.