How To Install RV Solar Power Kit Yourself
Easy RV solar power kit installation tips!
Learn how to install a 200-watt solar system on your RV.
This RV solar setup is affordable, it provides better-than-average solar power, and it’s reliable — especially when you’re boondocking (living off the grid).
(Don’t miss the “related article” for my pros & cons of installing a 200-watt RV solar kit yourself!)
============================
TRANSCRIPT:
Hi. I’m Curtis with The Fun Times Guide blog community. Today I’m going to talk to you about a medium-sized, middle-of the-road solar system. This is what I have installed on my van, and it has provided me with very good service for the past 4 years.
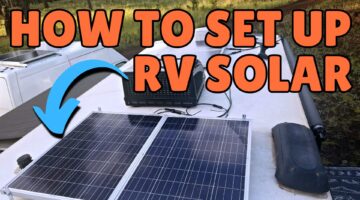
I have two 100-watt panels mounted towards the rear of the van on the roof. Instead of using the factory supplied brackets, I chose to use aluminum angle so that I could make use of the existing mounting tabs that are located on top of Nissan vans. That way, I did not have to drill any holes into the roof — except for the one hole where the cables come in. Beyond that, there is nothing puncturing the roof.
My charge controller is a straightforward 12-volt charge controller. It is not digital readout. It just has little green lights indicating that all is good with the world. So it is very simple and straightforward.
My battery bank is composed of 2 deep-cycle 120 amp hour lead acid batteries that are located underneath the bed in my van. This is the most inexpensive battery setup, but yet it has proven to be very reliable.
I also have a 1,500-watt inverter wired to my battery bank and this allows me to watch a little television. Or, when necessary, operate a few 110-volt appliances — such as an electric drill or a jigsaw if I find a project I need to take care of.
I have a small digital voltmeter mounted right alongside the head of the bed which gives me instant readout as to what the status is of my battery bank. As you can see, it is currently at 13.6 volts which is basically a full charge. And it is morning, and the sun is just now beginning to hit the panels solidly.
I consider this 200-watt system with 2 large deep-cycle lead acid batteries to be sufficient for moderate needs. In this application, I am using it to operate a 65-quart 12-volt compressor-driven refrigerator that can also be used as a freezer. That is the primary purpose — because food storage is a big issue when you are living the mobile lifestyle.
My personal feelings are that there is no real reason to look for the most expensive components. I use simple lead acid batteries that are readily available at Walmart for $100, approximately, once you put them in a box. You can buy lithium batteries for $1,000 and get 10+ years of service out of them. But I have found that lead acid batteries will reliably give you between 4 and 5 years of service. So the cost factor just doesn’t register as being appropriate in my mind. Lead acid does the job just as well.
You can upgrade to an MPPT Charge Controller for a few more dollars — which can maybe up your efficiency by 5%. But here again, I believe middle-of-the-road works just fine. My $20 charge controller has been reliable for 5 years. And at some point, if it should fail, I will upgrade it to a digital readout. But it is a simple 12-volt controller.
My whole system is 12 volts. The 2 solar panels are hooked together in parallel. The 2 batteries are hooked together in parallel. (That means hooking positive to positive and negative to negative, so that both the solar panel side and the battery side of the system are 12 volts.) It is not very complicated to hook up. There are only 4 connections on the charge controller. And if you have minimal electrical understanding, it should be a project that you can manage without any real problem. If there becomes a problem, there are plenty of resources on YouTube that can guide you through the process. Thank you for watching!
Playlist:


