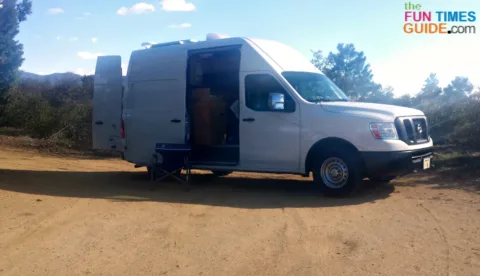
My first article in this series of DIY RV van conversion tips focused on reasons to pick the Nissan NV 3500 over the other possibilities.
For the purpose of completing all of the detail work in your cargo van conversion… starting from the top down makes the most sense. That way, one step won’t interfere with another!
So the next logical step is to decide on the layout of your Class B motorhome and determine exactly which amenities you want to include — because when you’re constructing a Class B motorhome, the first part of the project should be installing everything that you plan to have mounted on the roof.
Everything — from building the walls to paneling the ceiling — will be affected by what you have on the roof.
Wiring needs to be routed, bolts need to be tightened, and there are a number of things to consider that could be made more difficult if you haven’t done the rooftop installations first.
The Layout I Chose For My RV Van
The Nissan NV 3500 van makes many things easier than what you will find with other brands of vans.
For one, the roof is downright stout. Cross-ribs are placed about 14 inches apart, and the whole roof structure is strong enough that you can climb right on and walk on it without fear of denting or damaging the roof!
That is not the case with other brands that have maybe 3 total cross-ribs for the whole roof. If you climb on top of those, you will cause damage immediately.
In addition, the Nissan NV3500 also has a variety of brackets and bolt points mounted on the roof from the factory that greatly reduce the need to drill holes in the roof. Fewer holes in the roof means fewer opportunities for leaks!
The layout I chose for my RV van conversion included:
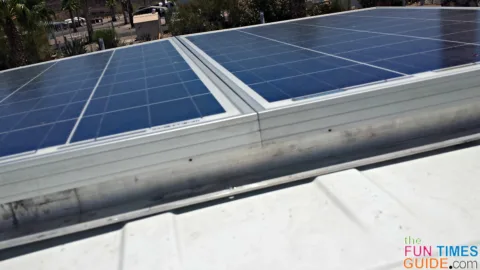
- 2 100-watt RV solar panels, mounted at the rear of the van
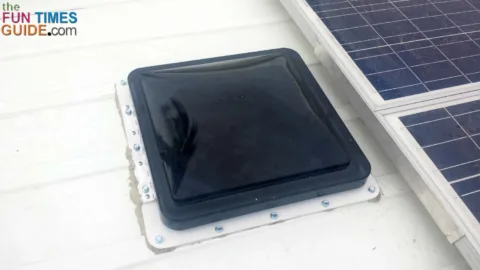
- a FanTastic RV vent, mounted just in front of the solar panels
There is still additional room to the front for additional solar panels — which may be mounted at a later time.
Here’s how I mounted these items in the roof of my cargo van…
How To Install Solar Panels On The Roof Of An RV Van
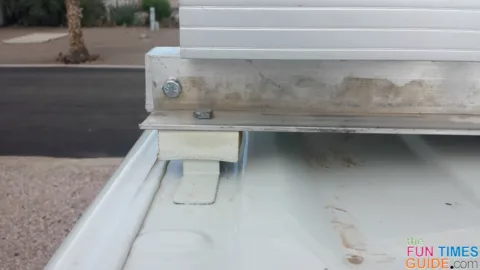
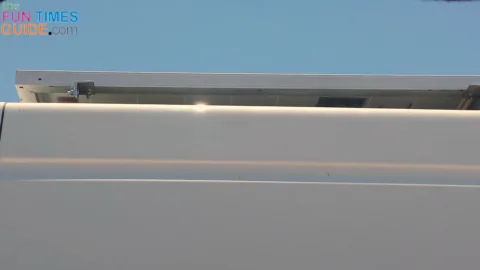
Using aluminum angle stock, brackets were made to reach across the RV van roof — bolting to the rear 4 attachment brackets located on the roof.
The 2 solar panels were bolted together solidly using aluminum angle.
TIP: Do not bolt the 2 solar panels directly to each other — because the frame of the solar panels is not strong enough to handle winds at highway speed!
Short pieces of aluminum angle were used to bolt the 2 solar panels to the cross brackets.
The only hole required in the roof is one to allow the hot and ground cables from the panels to come into the van.
TIP: Once you’ve installed these cables (which should be #8 wire), be sure to seal around the hole with a quality RV-rated sealant. I used Dicor self-leveling sealant.
Here’s my video about the RV solar panels that I use:
How To Install A Vent In The Roof Of An RV Van
The FanTastic RV roof vent takes a bit of extra care to put it in place in the roof of your van.
You don’t want to cut out a section of roof cross-rib. But you will have to trim off a narrow strip of the cross-rib flange to make the 14-inch square hole required to mount the vent. (This is a case where measuring twice and cutting once is a minimum requirement!)
The best way to accomplish this is to measure, mark, and drill 4 starter holes from inside the van. With the corners located, it’s easy to climb on the roof and draw lines connecting the holes.
TIP: Double-check your measurements with a carpenter’s square — because the hole must be square in order for the vent to fit in place!
Using Butyl putty tape and self-drilling screws, it’s simple to properly mount the RV roof vent — after the hole is cut.
It may be a little scary cutting such a big hole in a new van when you consider resale value — but rest assured, no matter where the van goes in life, having a powered vent in the roof will only add to its value!
What About Installing A TV Antenna On The Roof?
Installing a TV antenna on the roof of your Class B RV depends on what your goal is for reception:
- In most cases, a simple omni-directional antenna will do the job and require minimal effort to install.
- Since I will be using a portable satellite dish, the permanent mount antenna will be omitted for now. It only requires only one hole drilled straight through to the interior — so it can be added later, after the ceiling is completed.
The wiring and hookup for whatever you decide to mount on the roof will come later. This article is intended to get you thinking about and planning for what goes on the roof of your RV van — before you start working on the interior.

