I recently installed solar panels on my teardrop trailer. Now I’m going to describe how I did the wiring.

When you install solar panels on any RV, the one primary concern you should keep in mind is maximizing the charging power of the sun.
Part of the equation in this effort is to mount your RV solar panels so that they can be tilted (or orientated toward the sun) — so that the maximum amount of sunlight is hitting the panels straight on.
Once that’s accomplished, the next concern is voltage drop through the wiring. Wire size and distance are the 2 factors that can reduce the effectiveness of your solar system in a big fat hurry!
Fortunately, on a small teardrop trailer (or any small RV trailer) the distance is usually short. With that advantage, you don’t want to ruin everything by using too small a gauge of wire between the solar panels and the controller. You want to use the largest size wire that is practical to run this distance.
Here’s how I wired my solar panels for RV boondocking…
Why I Chose 10 Gauge Romex Wiring
For my installation of RV solar panels, 10 gauge household romex wiring was chosen for a few reasons:
- Solid wire passes electricity at a capacity 1 size greater than stranded wire. That means the 10 gauge wire works as if I had used 8 gauge automotive wire.
- Romex cable comes with multiple conductors encased in a second insulated covering. More protection is always better.
- Romex is available at Home Depot and is much cheaper than 10 gauge automotive wire. Neatness counts. If you do a sloppy job, you will be dissatisfied at some point and end up redoing it properly. The romex cable is a bright orange and would look bad against the neat white exterior of your trailer. Electrical conduit is either galvanized or a sickly gray plastic — neither of which would look very good.


Tips For Using PVC Plumbing Pipe
For this installation ½-inch PVC plumbing pipe was used — because by using fittings to make the corner from the roof to the front surface, it provided a neat clean look that was the same color as the trailer. No painting was required.
Be aware that 10 gauge romex isn’t very flexible, so the 90 degree fitting was threaded onto the wire before the wire was run through the PVC pipe. It took a few minutes, but it threads that way pretty easily.

The plastic PVC pipe was attached to the trailer with standard metal conduit clips, held with one screw each. To minimize the opportunity for water to infiltrate, only 3 clamps were used and after installation the screw heads were sealed with silicone.

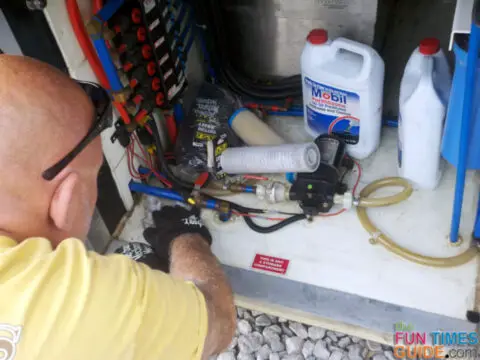
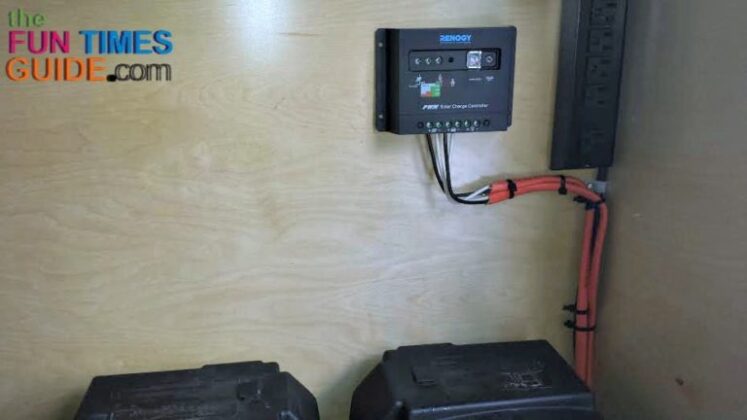
Installing The Ground Controller
This particular solar kit, the 200-watt Renology Solar Kit, happens to have a positive (+) ground controller.
Since RVs and cars are universally negative (-) ground, you have to keep this in mind when you mount the controller. All that means is you do not want to mount the controller on a metal surface or use screws that may somehow come in contact with metal as well.
The simple answer in this case was to use a 2” x 3” piece of Velcro, and attach the controller to the wood wall of the RV trailer. There is no need to ground the case, since we’re only dealing with 12 volts and there is no real chance of shock.

My Best Advice When Wiring Solar Panels For RV Boondocking
Your RV solar panel installation may have some variables that don’t quite match this installation.
The 2 things you need to remember when wiring solar panels for RVs:
- Mount the solar panels as close to the batteries as possible; and
- Use the largest size wire that is practical and manageable.
I’ve been involved in RVing for over 50 years — including camping, building, repairing, and even selling RVs and motorhomes. I’ve owned, used, and repaired almost every class and style of RV ever made. I do all of my own repair work. My other interests include cooking, living with an aging dog, and dealing with diabetic issues. If you can combine a grease monkey with a computer geek, throw in a touch of information nut and organization freak, combined with a little bit of storyteller… you’ve got a good idea of who I am. To date, I’ve shared my RV knowledge in over 300 articles here at The Fun Times Guide! Many of them have over 25K shares.